Are you looking to update the interior of your home? If so, a fresh coat of paint may be just what your home needs. It’s a quick, easy, and affordable way to revive, modernize, and transform your space. By just changing the color of your walls, you can brighten a room, make a space appear bigger, and add value to your home. If you’re considering DIY interior painting, these are some tips, tricks, and techniques that could prove to be useful. If you’re not up for the task, don’t be afraid to call a professional—just know you won’t get the most bang for your buck!
Planning
You’ve decided you want to paint the interior of your home. As you begin planning, there are a few things you need to consider. First, discuss your budget. Although painting is a fairly inexpensive way to remodel your home, small costs can add up. Decide how much you’re willing to spend before beginning your home renovation project. Second, choose what paint finish you want. The most common interior paint finishes are flat, eggshell, satin, semi-gloss, and high-gloss. This decision depends on your desired look, durability, and aesthetic. Third, choose what color you want. I recommend applying various swatches of color to your wall before committing to one shade. Give yourself 24 hours to determine which color you like best.
After deciding on the exact color and finish of the paint you want, start thinking about the tools you’ll need to complete the task. ScotchBlue painters’ tape is highly recommended for taping off trim and ceilings. This will allow you to accomplish your paint job faster and with fewer mistakes. You’ll also need a drop cloth to avoid painting disasters. Professional painters prefer canvas drop cloths because they are thick, heavy, durable, and absorbent. Although they’re more expensive than plastic or paper drop cloths, they’ll last for many years.
To apply the paint, you’ll want small brushes for detailed work and paint rollers for large, sweeping strokes. Because rollers require paint trays, you’ll need to purchase a reusable or disposable paint tray. The Bercom 7500-CC Handy Paint Tray is highly reviewed on Amazon. It holds an entire gallon of paint and has a built-in magnetic brush holder. Lastly, you’ll need to invest in a ladder if you don’t already own one. I also recommend having extra roller covers, a paint can opener, and a stir stick on hand! Thorough planning will ensure you have everything you need when it’s time to begin painting.
Preparing
After you purchase your paint and essential painting tools, you can begin to prepare for your DIY project. If you’re planning on painting in the near future, it’s best to move furniture completely out of the room you’re painting. You’ll then need to remove draperies, pictures, and mirrors off of the walls so you can properly prep the surfaces that will be painted. Cracked or flaking paint will need to be scraped off with a paint scraper, while holes or blemishes should be repaired with spackle. Don't forget about switchplates and outlet covers! They should be removed rather than painted around. Next, walls will need to be wiped down with a damp cloth in order to remove excess dust and dirt. Finally, walls should be primed so that paint will adhere properly, and since I know what you’re thinking—no, I do not recommend self-priming paint.
Painting
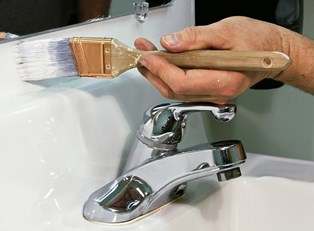
When you’re finally ready to paint, you’ll be happy you’ve already completed these tedious tasks. All you’ll have to do before you begin is tape off all woodwork, fixtures, ceilings, and hardware. You should also cover the floor with a drop cloth and open a window for good ventilation before you begin painting.
It’s recommended to cut-in (use a brush instead of a roller) around the trim with an angled brush two to three hours before using a roller to fill in the walls. Once the first coat is applied to your walls, determine if you need a second. You should wait another two to four hours if you decide to apply a second coat of paint. When your final coat of paint is fully dry, remove the painters’ tape at a 45-degree angle. If you’re worried about cracking at the paint line, you can score the edge of the tape with a putty knife or razor blade before removing it. This will leave you with a clean finish!
Cleaning Up
Whether you’re taking a break while your first coat of paint dries or you’re cleaning up after completely finishing your DIY project, there are a few tips you should know.
Rollers and paint brushes don’t have to be washed if you intend to use them again in the next 24 hours. Instead, wrap them in plastic wrap or plastic bags to seal out air and stick them in your refrigerator. This will prevent rollers and brushes from drying so they’ll be ready to use when you decide to continue painting. When you are completely finished with them, wash them with soapy water or a solvent (depending on whether you used a water-based or oil-based paint), give them a thorough rinse, and then let them dry.
If you have leftover paint, it’s best to save it for potential touch-up jobs. Wipe any excess paint from the can, replace the lid, firmly seal it by tapping it with a rubber mallet, and store it in a cool, dry location. For convenience, you can even tape the paint can opener to the lid of the paint. If you have no desire to keep the excess paint, consider donating it to a local artist or theatre group!