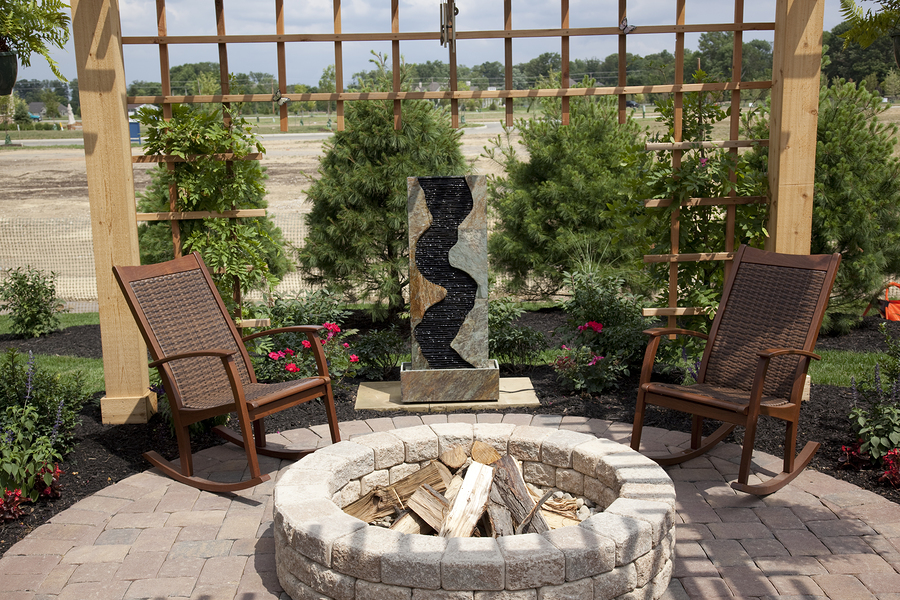
Adding a fire pit to your backyard is the perfect way to make the area more inviting and enjoyable. The process is extremely simple, too! The whole project shouldn’t take more than a day (a few hours at most), so you can be roasting marshmallows in your backyard before you know it.
For this project, head to Home Depot. You’ll need concrete blocks (the amount depends on the size of the pit), a shovel, and a large steel bowl (optional) to house the fire.
- Check with local ordinances or homeowner’s association guidelines to see if firepits are allowed in your area.
- Choose a location for your firepit. Avoid areas close to your home or under low-hanging limbs.
- Dig a pit in a safe location as long and deep as you want your fire pit to be (unless you're using a steel bowl.).
- Make a ring (or square) using a few layers of bricks or concrete blocks. Stagger the bricks.
- Set the bowl (if using one) on the top of the bricks with its bottom in the center of the ring.

For those looking to enhance the appeal of their bathtub, the options boil down to either purchasing a new one or refinishing the existing tub. Opting for the latter is a choice often favored by DIY enthusiasts, as it not only saves time and money but also involves a relatively straightforward process.
For this project, you’ll need cleaning supplies, Lime-A-Way, an abrasive pad, 400-600 grit sandpaper, caulk, painter’s tape, paint, paintbrush, epoxy, and some denatured alcohol—all readily available at your local Home Depot!
- Clean the tub and its surroundings with Lime-A-Way and an abrasive pad.
- Wet the sandpaper for rinsing grit away as you work.
- Sand the tub to eliminate grime or gloss, enhancing the adhesive potential of the tub’s surface.
- Mix the epoxy and paint.
- Use a brush and roller to apply two light coats, spacing them one hour apart.
- Brush in a single direction, feathering edges to prevent visible lines between painted areas.
- Expect small bubbles to form; they should level on their own over time.
- Tape off the areas around the line you intend to seal with caulking.
- Apply caulk around the tub and the corners of the tile walls.
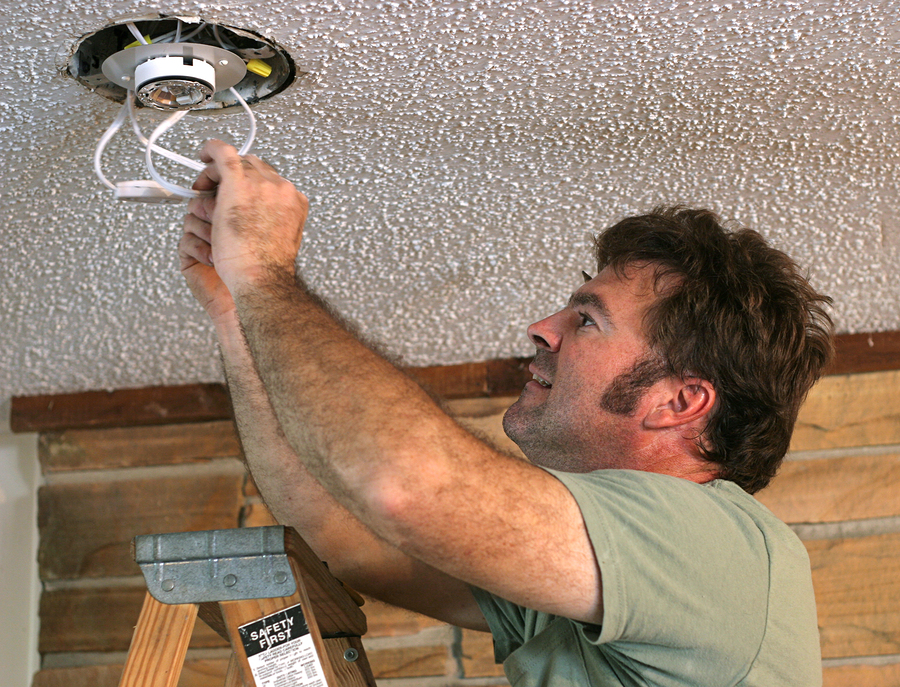
A nice light fixture can serve as a great accent for any room, while the wrong fixture can be an incessant eyesore. Swapping any old or ugly fixture out for a new or different one from Home Depot is a great way to make a big change to a room without having to do much work.
For this project, you’ll need a ladder, some wire cutters, a wire stripper, wire connectors, a work light, an extension cord, a drop cloth, some safety glasses, and your new fixture.
- Turn off the power.
- Set up your ladder.
- Remove the cover from the old fixture.
- Carefully remove the old wire connectors and untwist the installed wires from the fixture wires.
- Remove the trim or base of the old fixture.
- Remove the coating from the end of the wires on the fixture.
- Following the manufacturer’s instructions for your fixture, match the wires on the new fixture to the wires installed in your home.
- Wrap the bare sections of the corresponding wires together and screw on the wire connectors.
- Fold the wiring into the electrical box or into a space within the base or canopy (follow manufacturer’s instructions).
- Attach the fixture’s base or canopy to the electrical box.
- Install the bulbs.
- Turn the circuit back on, then turn on the light to make sure the wiring is working properly.
- Install the cover.

A mailbox is the perfect thing to remodel if you want to show off your work: anyone driving by your place will see it! Unless your mailbox is brick, replacing or installing one shouldn’t be too much of a chore. Of course, you’ll need to remove the old mailbox (a shovel and pick-axe should do the trick), but the rest of the installation is quite easy. For this Home Depot project, you’ll need gravel, lettering and numbering for your mailbox, a level, a post, a post hole digger, a quick-setting concrete mix, a screwdriver, a shovel, and your new mailbox.
- Dig a hole deep enough to both hold six inches of gravel for drainage purposes and also leave the mailbox 42 inches off of the ground, the regulation height.
- Pour the six inches of gravel into the hole.
- Follow the manufacturer's instructions to mix concrete.
- Place the pole in the hole.
- After the post is set in position, fill the hole with the prepared concrete mix while tamping (this will remove air pockets).
- Use the level to ensure the post is balanced.
- While the mix is still malleable, slope the concrete around the base of the post to promote water runoff.
- Once the mix has dried, you can cover the concrete in soil if you wish.
- Your new mailbox should have come with attachment brackets (if not, your old mailbox should have a set). Use these to attach the mailbox to the top of the post.
- Check the angle of the constructed mailbox with the level.
- If you purchased lettering and numbering, now is the time to add it to your new mailbox.
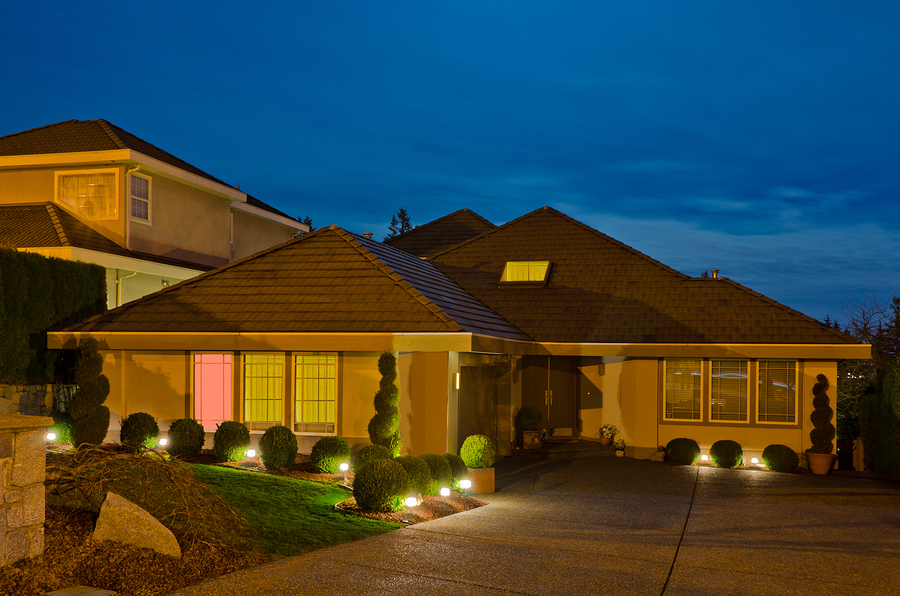
Installing landscape lighting is a great way to spruce up your yard. A sidewalk, garden, or driveway lined with landscape lighting is hard to miss and quite nice to look at. This project can add value to your home in terms of both appearance and security: the lights make for great accents, and well-lit yards deter criminals or home invaders.
For this project, you’ll need an edger or a flat-blade shovel, a pair of wire cutters and some wire strippers, a screwdriver, work gloves, your new lights, a power pack to control the lights, and some cable (12-gauge for systems over 200 watts, 16-gauge for systems less than 200 watts). Home Depot has plenty of landscape lighting options to choose from!
- Find the area(s) you want to illuminate using a flashlight after dark.
- Pick out and purchase your landscape lighting accordingly—these lights will either be solar powered, which you simply have to stick into the ground, or they’ll be wired and have a longer installation process.
- Ensure a GCFI outlet is close enough to plug in and power your lights.
- Make sure the area in which you plan to dig has no underground utilities that might become damaged during this project.
- Place (or mount) the power box near the outlet. Don’t plug the lights in yet.
- Assemble the lights (follow manufacturer’s instructions) and place them near the area where you intend to install them.
- Lay out your cable and attach the lights to it using a cable connector.
- Dig a trench (3-4 inches deep) along the path you wish to light. Be sure to make the trench wider near the actual lights to fit extra cable if need be.
- Push the lights into the ground gently, then step back and ensure you like the configuration.
- Once you have the lights how you like them, push them into the ground more firmly.
- Plug the lights into the power pack and the power pack into the outlet. Test to make sure the lights are working correctly.
- Fill in the trench to cover the wiring. Once you’re done, you can use your power pack to adjust settings and make sure the lights aren’t on when you don’t need them to be.
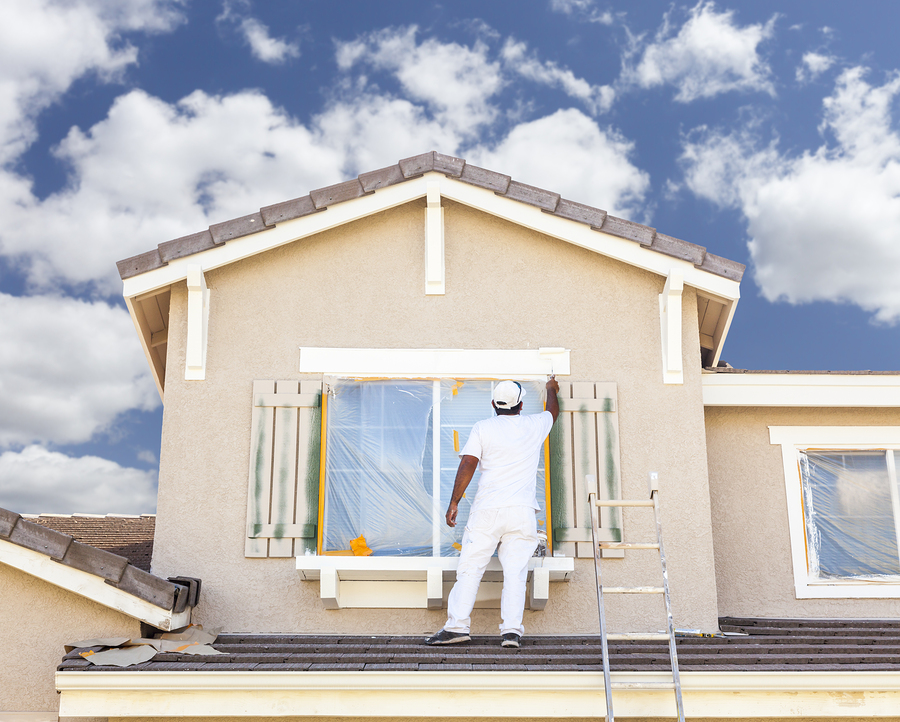
A nice set of shutters from the Home Depot will serve as a great accent to your home’s exterior and add quite a bit of curb appeal. Direct-set shutters (shutters that remain open and have no hinges.) are the easiest kind to install. Even if your home is brick, you can install and have direct-set shutters up and hanging in no time at all.
For this project, you’ll need the mounting materials for the shutters (screws for siding, drywall anchors for brick), the shutters themselves, some caulk, a hammer, a screwdriver, a drill, a level, and the paint and/or finish of your choice.
- Before starting the installation, paint and/or finish the shutters and let them dry.
- Open and close the louvers once you’ve painted the shutters to make sure they don’t stick together. The more coverage you have, the more your shutters will be protected from moisture.
- Most shutters will come with pre-drilled guide holes for installation, but if yours do not, you’ll need to drill them yourself. One hole in each corner and one in the left and right sides (centered vertically) should do the trick.
- Place the shutters over the proper window and use a pen or marker to mark the screw holes on the home.
- In the marked areas, drill a starter hole for your screws (use a 1/8 inch bit for siding and a 1/4 inch bit for brick). If your home is brick, install drywall anchors for extra support.
- Using your guide holes and consulting the manufacturer’s instructions, screw the shutters into place.
- Install any locking mechanisms that come with your shutters.
- Add a thin layer of caulk between the exterior wall and the shutters.
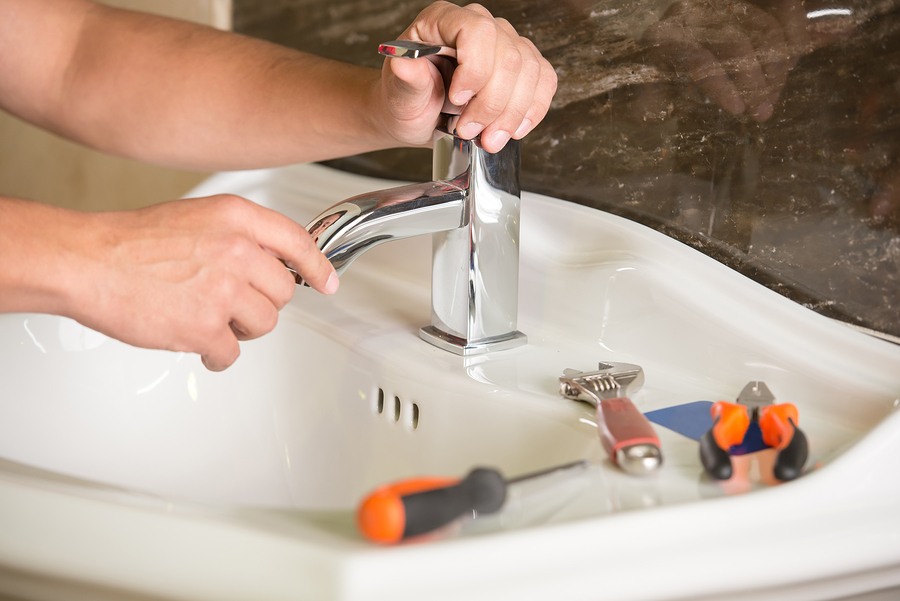
An unattractive or leaky faucet can be a major annoyance. Luckily, replacing a faucet isn’t too difficult and can be done in a matter of hours.
For this Home Depot project, you’ll need an adjustable wrench, a basin wrench, some rags, a bucket, the new faucet, of course, and any additional mechanisms of the faucet that you’d like to replace (supply lines, drains, and other components may also need replacing.
- Turn off the water supply.
- Turn on the faucet to release any water left in the line.
- Remove any additional components you plan to replace so you can take them with you as you shop, making sure to find parts that match.
- Use a basin wrench (or your hands if possible) to disconnect the supply lines from your faucet.
- Detach the lift rod and unscrew the nuts from beneath the faucet.
- Remove the faucet and clean the newly exposed areas.
- Install the new faucet according to the manufacturer's instructions.
- Connect the faucet to the supply lines from beneath the sink.
- Turn the water supply back on, temporarily remove the aerator from the faucet’s spout, then run some water to flush out any debris.
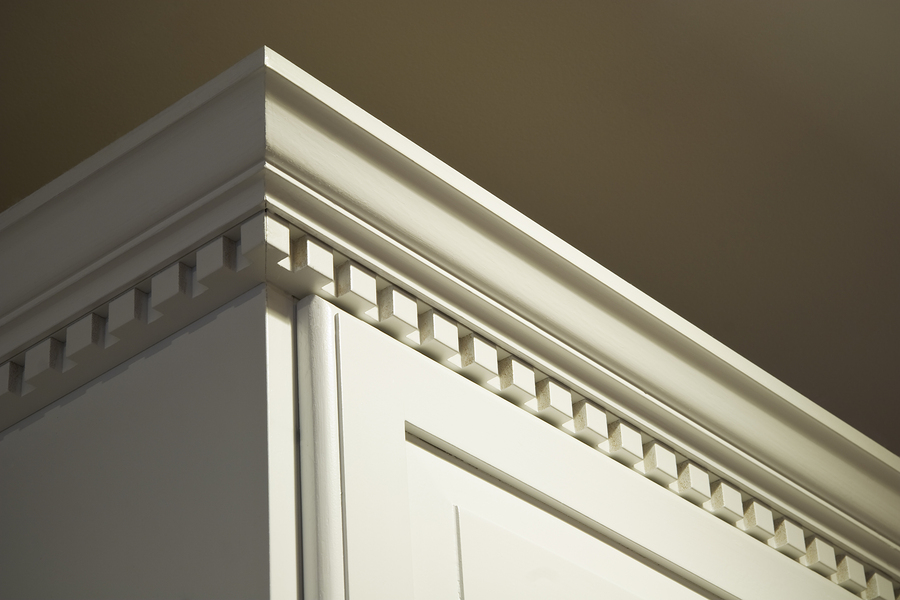
If your kitchen is lacking something or seems boring, your cabinets might be to blame. A great way to improve them aesthetically is to add some crown molding from Home Depot. If you already have crown molding elsewhere in your home, this is an opportunity to install the same style molding, making the look and feel of your home more cohesive.
For this project, you’ll need some lumber (2x4s and 1x4s), a tape measure, a miter saw, a ladder, a nail gun, a baseboard, some construction adhesive, and your crown molding of choice.
- Measure behind the cabinet’s front stile (between the two side stiles) and cut a 2x4 to that length. Secure it behind the stile with adhesive and a nail gun.
- Measure the length for the side stiles (between the front 2x4 and the wall behind the cabinet), and follow the same process until you have a 2x4 secured on each side of the top of the cabinet.
- Measure the top sides of the cabinet from end to end, NOT between the stiles. These measurements should be slightly longer than your first cuts (1x4 lengths = your first measurements + the width of the stiles).
- Using these measurements, cut a section of 1x4 for each side. Nail and glue these to the 2x4s you’ve put in place.
- Using the measurements from step 3, cut 45 degree angles into three lengths (one for the front and one for each side) of baseboard.
- The angled cuts should point toward one another, not be parallel.
- The cuts should start at the length of the cabinet side and move outward, meaning the side of the baseboard that will be facing outward will be slightly longer than the other side.
- Try fitting the pieces together to ensure the angles match and fit snugly.
- Piece by piece, glue and nail the baseboard to the 1x4s along the top of the cabinet.
- Measure the baseboards end to end.
- Cut a length of crown molding to fit each side. These cuts will also be at 45-degree angles, facing one another, with the outward-facing side of the molding slightly longer than the side you’ll attach to the baseboard.
- Glue and nail the pieces to the corresponding length of the baseboard.

The color or pattern of your wallpaper plays a huge part in how a room feels. Picking out and applying new wallpaper from Home Depot is the perfect way to re-invent a space without having to shell out the big bucks.
For this project, you’ll need a step stool, a pair of rubber gloves, a bucket or two, a paint roller and paintbrush, a paint tray, a sponge, sandpaper, a straight edge, a level, a pencil, some primer, some drywall compound, a putty knife, a utility knife, a wallpaper hanging kit (seam roller, smoothing brush, adhesive, etc.), and your new wallpaper.
- Turn off your power and then remove any socket covers or faceplates from the wall.
- If you have wallpaper in the space already, it’s best to remove it rather than wallpapering over it.
- Use drywall compound and a putty knife to fill any holes or uneven areas on the wall and sand it smooth once you’re done. Clean off any remaining debris.
- Prime the wall if necessary. Let this dry for at least two hours before you apply the paper.
- Use a level and a pencil to create guidelines for the paper before you apply it.
- Measure the height of the wall you wish to wallpaper. Add four inches (two for the top and two for the bottom) for trimming.
- Using those values, carefully make your cuts in the paper. Be sure to use a sharp knife to prevent accidental tearing.
- For paper that isn’t pre-pasted, place it face down and use a roller to apply an even, generous coat of paste all the way to the paper’s edges.
- For paper that is pre-pasted, roll up a strip of wallpaper adhesive-side-out and submerge it in cold or lukewarm water until it is thoroughly wet.
- Once the adhesive is ready, you may begin applying the wallpaper strips.
- Carefully align the strips with any guidelines you have, and then smooth the edges of the paper with a moist sponge.
- Brush outward from the center of the strip to its edges with the sponge. Then run a smoother across the entire area of the paper to remove any bubbles or wrinkles.
- Using a sharp blade, trim the extra from the top and bottom, making it flush, then smooth this area of the paper out as well.
- Repeat this process until finished, avoiding any overlap and carefully matching the patterns on each strip.
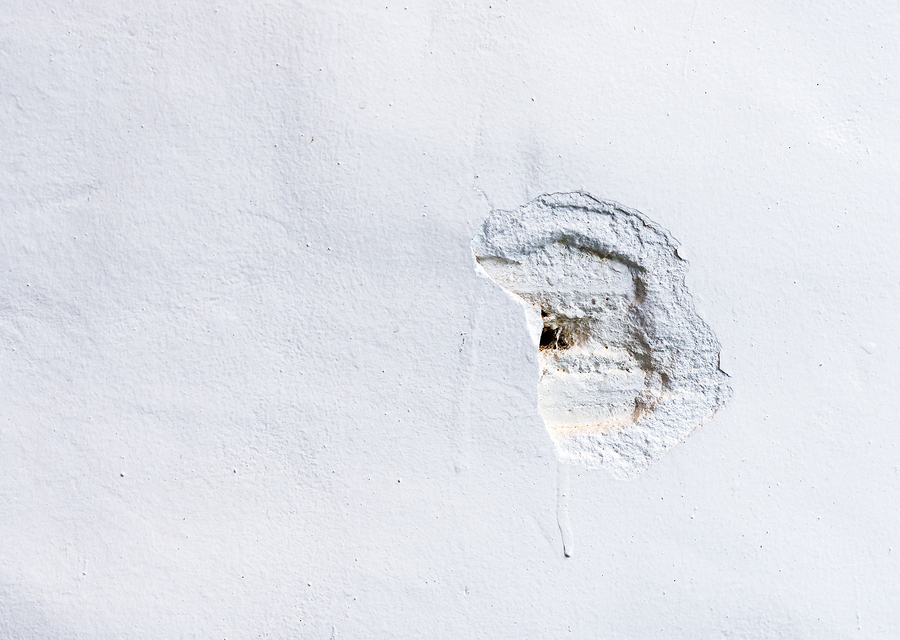
A hole in the wall is an obvious eyesore for any homeowner. The good news is that these imperfections can be fixed without having to hire a professional and you might already have all the supplies you need—if you don't, run to Home Depot.
For this project, you’ll need a drywall saw, construction adhesive, two taping knives (one 6-inch and one-12 inch), a utility knife, sandpaper, a screwdriver, patching mesh (an old window screen will do), drywall, joint compound, screws, and wood strapping.
- Find some drywall that matches the thickness of the wall you’d like to patch.
- Cut out a square patch big enough to cover the hole.
- Place the patch over the hole and trace its outline.
- Using a drywall saw, cut the outline from around the hole. For best results, cut along the line with a utility knife and snap the drywall pieces inward, then cut them free using the knife.
- Cut a piece of a 1x3-inch piece of wood strapping, making it six inches longer than the hole’s height.
- Apply adhesive to the entirety of one face of the strapping and carefully insert it into the hole, pulling the side with the adhesive tightly against the inside of the wall.
- In a staggered pattern, drive two screws through the drywall and into the strapping. Do this for both ends.
- Insert the patch into the hole you cut out and press it firmly to the adhesive on the strapping.
- Drive a screw through the patch and into the strapping.
- Use your smaller taping knife to apply a thin layer of joint compound to the patch, the screw heads, and the seams of the patch.
- Cut a screen to be a few inches wider and longer than the patch and press it into the compound. The screen will prevent the formation of cracks between the wall and the patch.
- Add more of the compound, working from the center outward to stop wrinkles from forming, and then wipe the excess away with the taping knife.
- Apply the last coat. Give the first coat a day or so to dry and then add another thin layer using your 12-inch taping knife.
- Once that layer is dry, sand it smooth with fine sandpaper, making sure to overlap several inches beyond the edges of the previous coat and being careful not to sand so much that you expose the screen.
- Wipe away the dust, and then paint over the patch.
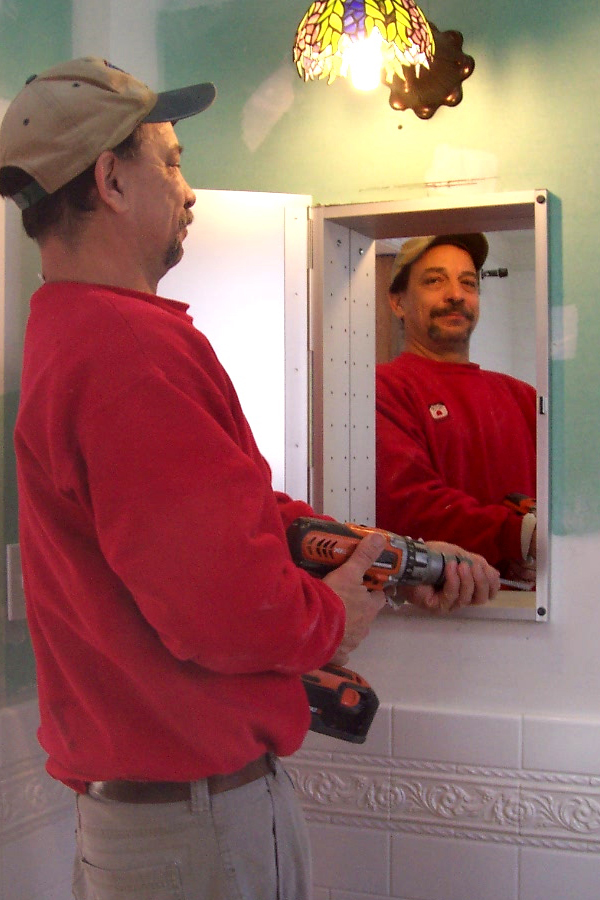
Adding a medicine cabinet is a great way to make your bathroom more functional and make the space look much more attractive in just one move. The installation isn’t too tricky either and can usually be completed in a day.
For this Home Depot project, you’ll need a stud finder, construction adhesive, some caulk, a utility knife, a flashlight, a level, a drill, a hacksaw blade, a handsaw, a rasp, a keyhole saw, and a cabinet to install.
- Before you get started, make sure the area you want to install the cabinet won’t prove problematic.
- Use a stud finder to locate any studs. Cutting some small holes into the wall will most likely be necessary in determining whether or not wires, pipes, or vents will be in your way.
- If there are any immovable obstacles, consider buying a surface-mounted cabinet instead.
- Once you’ve found the cabinet you’d like to install, have a friend hold it in place, keeping it level so that you can trace its outline.
- Use your keyhole saw to cut along the line. Carefully remove the drywall, ensuring not to damage the wall portions that will be visible.
- Remove any insulation or other debris.
- You’ll likely have at least one stud in the way. If it’s not load-bearing, you can cut it out using a handsaw, but it may also be connected to the back wall. If so, slide a hacksaw blade behind the stud and use it to cut through the drywall screws holding it in place.
- Make sure the studs, once cut, are flush with the top and bottom of the hole you’ve prepared.
- Place the cabinet in the hole to ensure it fits. Removing the shelves and doors will make the cabinet easier to handle. Use a rasp and/or utility knife to even out any tight spaces.
- Take the cabinet back out of the wall so that the hole is exposed.
- Measure the height of the hole and the distance between the studs you cut. Cut four 2x4s (one for each side) to match these lengths.
- Put construction adhesive onto the ends of the shorter cuts and slide the board between the studs, flush with the edge of the cavity. Hold it in place by driving screws through the drywall and into the board.
- Screw the longer, vertical blocking boards in place.
- Fit the cabinet back inside the cavity after the blocking is in place, making sure the frame is flush against the wall.
- Drive drywall screws into the blocking through the guide holes in the side of the cabinet.
- If you need to, you can caulk between the cabinet and the wall to hide any irregularities.
- Assemble the rest of the cabinet if you haven’t already.

Almost everyone enjoys a nice shower. However, your showers might not be as enjoyable if your showerhead is old, ugly, or in some way broken. Luckily enough, they are extremely simple to replace. From start to finish, a Home Depot project like this will likely take you under an hour.
For this project, all you’ll need is your new showerhead, an adjustable wrench, and Teflon (or plumber’s) tape.
- After loosening the connection using your wrench, unscrew the showerhead by hand, turning it counterclockwise.
- After it’s unthreaded, the showerhead can be removed.
- In a clockwise direction, wrap the tape around the threads of the shower arm two or three times.
- Push the tape into the threads.
- Screw the new showerhead onto the taped threads and hand-tighten.
- Turn on the water and let it run. Check for leaks.
- If leaks are present, re-tighten the showerhead or remove it and apply more tape.
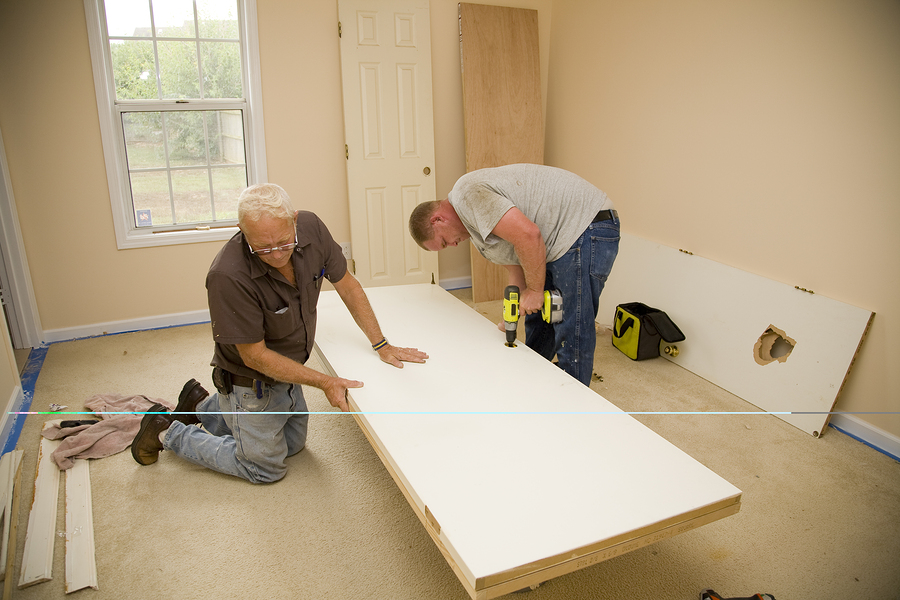
A boring or ugly door can put a damper on your whole space, but a nice, paneled door can make all the difference. Going out and buying a new paneled door can be expensive, though. If you’re willing to put forth the effort, you can just turn your existing smooth door into a paneled door with the help of Home Depot.
For this project, you’ll need some paneling (1/4-inch plywood works well), some short (1-inch) finishing nails, an arbor to make a hole for the handle, contact cement and veneer (if your door isn’t perfectly smooth), a nail gun, caulk, and paint.
- Remove the door from the hinges (keep track of the screws) and move it to an open area.
- Take off any remaining hardware, like the handle or deadbolt.
- If the door is real wood, you may need to sand it down in order to apply the paneling.
- If the door is made from synthetic materials and isn’t smooth, you’ll need to apply veneer (using contact cement) to the entire face of the door.
- Look online or at other paneled doors to get an idea of what kind of design you’d like. If you need to, you can sketch the design onto the door to better visualize the finished product.
- Carefully cut the border panels from your plywood and place them freely on the door to ensure they fit. Trace the outline of the hole for the doorknob onto the panel(s) that will be placed there.
- Cut the doorknob hole out using an arbor. Do the same for the deadbolt if your door has one.
- Carefully place the pieces of the border on the door one at a time and secure them in place using your nail gun. A nail every several inches will do the trick.
- Now measure and cut the horizontal panels and place them equidistantly. Secure them in the same fashion as the other pieces.
- Spackle over the indentions made from the nails, and apply a thin line of paintable caulk between the panels and the door to give them a seamless look.
- Once that’s done you can finish/stain/paint your new paneled door (this is easier to do while the door is still detached).
- When it’s fully dried, reattach the door to its hinges and re-install the doorknob.
- Since the door is now slightly thicker than it used to be, you’ll likely need to move the door casing (the trim inside the frame that stops the door.). Remove the strips that make up the casing and sand down the area beneath them (you might need to re-paint this area).
- Close the door and slide the strips of trim flush against its edge so you can be sure that they won’t be in the way. Nail them in place.
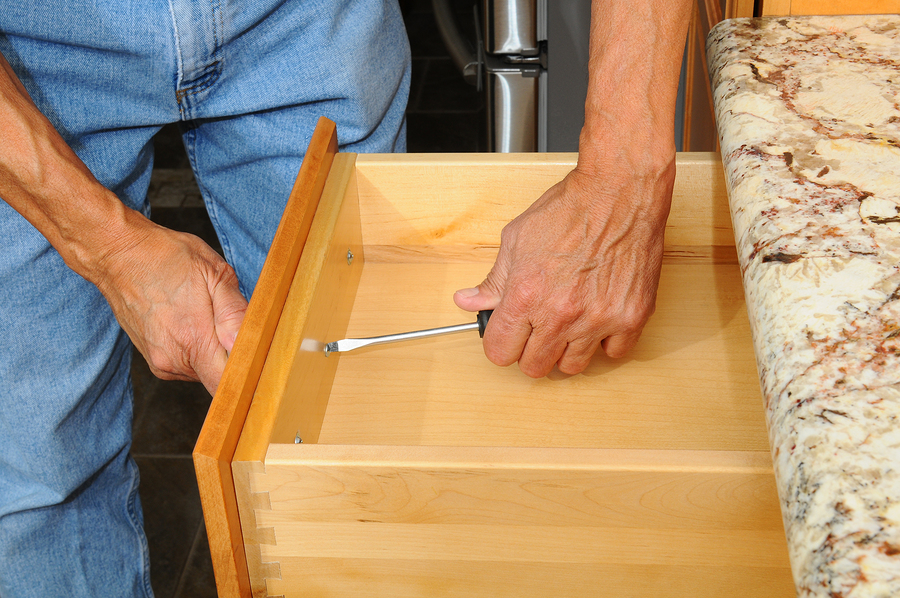
The handles of your cabinets and drawers are small, but they contribute to the look of a room in a big way. Replacing your old handles is good way to perform some renovations without having to spend a fortune or do any serious construction.
For this project, all you’ll need is a screwdriver, screws, and your new hardware from Home Depot.
- The first thing you’ll need to do is count the number of handles you’d like to replace so you know how many you should buy.
- When choosing handles, be sure to keep the current aesthetic of your home, drawers, and cabinets in mind and find pieces that compliment them.
- Take your old handles to the store and try to find new ones with screw holes the same distance apart (this way, you can use the existing holes to install the new handles)
- Remove all of the old hardware using a screwdriver (keep the screws if your new handles did not come with any).
- Secure the new handles in place using your screws and a screwdriver.
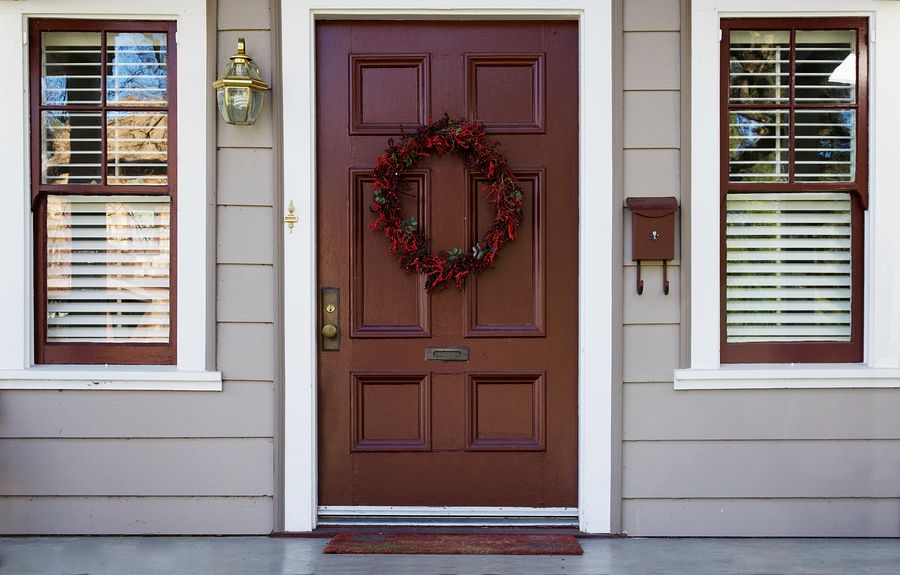
The appearance of your front door is a big part of your home’s curb appeal. A plain or otherwise unappealing door can be made into a stylish accent with little more than a couple of coats of paint. For this project, you’ll need some rubber cement, paint, masking tape, a paintbrush, and a paint roller from Home Depot.
- You can completely disassemble the door (take off hinges, remove locks and knob) to paint it if you wish. By doing so, you will eliminate the need for masking and prevent potential drips. Or you can leave the door up and paint it where it is.
- Lightly sand the surface of the door to remove blemishes and allow paint (or primer) to adhere better.
- If you choose to keep the door in place and intact while you paint, use masking tape to protect the doorknob and locks from being painted. You can also use the tape to protect the frame from coming in contact with the wet paint.
- Over the hinges, apply a few coats of rubber cement so that you can paint over them and then peel the coats away afterward.
- Apply primer to the door if need be. You may need to do so if your door is dark and you’d like to paint it a lighter color or if the door is made of bare or stained wood.
- First, paint the inside edge of the door (where the hinges are).
- Work across the door, moving in one direction.
- With a four-inch roller, apply coats to the middle of the door.
- Use a brush to fill in the edges and even out the coat. When painting a wooden door, be sure to make your brush strokes in the same direction as the wood grain.
- Allow time for the coats to dry, remove any masking, and reassemble the door.
